I have been promising and promising my daughter that I'd make her a white and gold corset. I got this fabulous white brocade from a friend taking down her curtains. I've lined the inside with the beige coutil I had leftover from another project.
The mail order busk arrived yesterday, and I put it in the seams last night. It looks really lovely so far.
Now it's ready to try on, and make any last fitting adjustments before I do the boning channels. This is my first attempt at a "nice" corset using the Silverado style in the Laughing Moon pattern -- yeah, the one with the intimidating gore inserts. I've tried it before with plain denim for my friend to wear under her Dickens Fair gown, but never something nice enough to be seen. The pressure is on!!
Tuesday, January 21, 2014
Saturday, January 18, 2014
The Finished Mononoke
Looking back, I realize I never posted a photo of the finished Princess Mononoke outfit. Here is the complete ensemble, as worn on Halloween.
Friday, December 27, 2013
Conquering the Invisible Zipper
For this year's Dickens Fair, I wanted to make a simple dress that was light, comfortable, and did not have a lot of fussy details to stress over. I chose the age-old Simplicity pilgrim/frontier dress pattern even though its envelope photo is simply awful. What appealed to me is the (pardon the pun) simplicity of it -- a bodice front & back, simple sleeves, and an attached skirt. Surprisingly it has some nice features like a drop-point waistline and, if I so choose, accessories like a mop cap or shoulder drape. With some modifications to the sleeves and shoulder caps, I thought this could turn out rather well.
One drawback: this pattern calls for a big ol' zipper. Of course we all know that zippers were not invented yet in the Victorian Era, but I did not have the energy to make buttonholes, hooks and eyes, or snaps all down the back. So I decided to try the Dreaded Invisible Zipper.
Like most people who sew as a hobby, I have avoided the invisible zipper because of its fearsome reputation. Until now! Emboldened by my recent successes in corset making, I leaped right in.
First, I purchased an "invisible" zipper and the accessory package of universal zipper foot. Then I went home, opened the packages, read the instructions, and felt overwhelmed with confusion.
Once I added the final fashion accessories of a lace drape around my neck, the bonnet, and so forth, it was quite comfortable to wear at the Dickens Fair all day.
One drawback: this pattern calls for a big ol' zipper. Of course we all know that zippers were not invented yet in the Victorian Era, but I did not have the energy to make buttonholes, hooks and eyes, or snaps all down the back. So I decided to try the Dreaded Invisible Zipper.
Like most people who sew as a hobby, I have avoided the invisible zipper because of its fearsome reputation. Until now! Emboldened by my recent successes in corset making, I leaped right in.
First, I purchased an "invisible" zipper and the accessory package of universal zipper foot. Then I went home, opened the packages, read the instructions, and felt overwhelmed with confusion.
Seriously, these instructions are not helpful to the novice. I resorted to The Internet for answers and found a YouTube video by Professor Pincushion. Whoever this woman is, I owe her a debt of gratitude for her clear and easy instructions. https://www.youtube.com/watch?v=ZlIFCuP3sZo
All in all, the assembly of this entire gown took a single weekend. That's start to finish from cutting, to sewing, to embellishing. I used the machine's button feature to tack a row of buttons down the bodice front to give the illusion that it's buttoned, and the invisible zipper in back blends in with the stripes fairly well so it's hardly noticeable. The idea is that you're stitching so close to the zipper's teeth (with the custom zipper foot attachment) that it's a very small flap of fabric.
Once I added the final fashion accessories of a lace drape around my neck, the bonnet, and so forth, it was quite comfortable to wear at the Dickens Fair all day.
Sunday, December 1, 2013
Hoop Snips
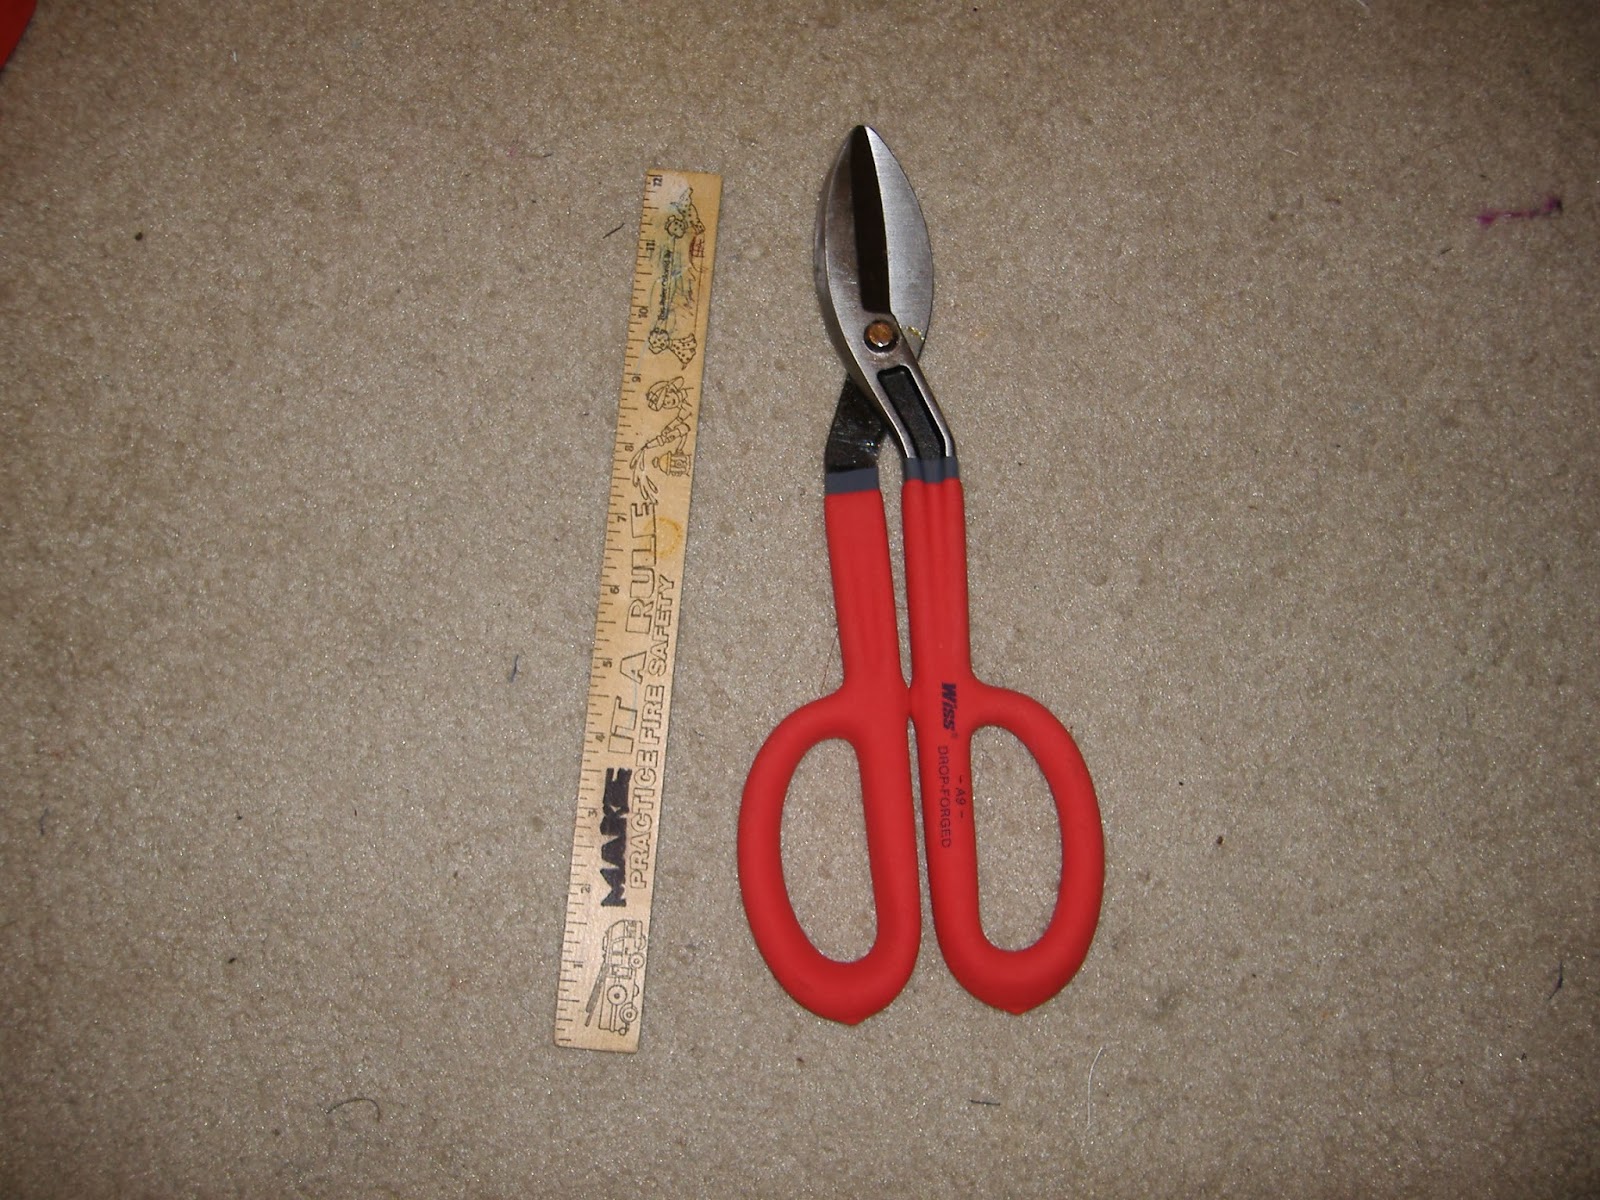
I let the Black Friday crowds die down, and on Sunday afternoon I went to OSH for "tin snips." Not sure of which kind would be best, I got the biggest ones they had for under $15. I figure they'll be handy to have around the house. Yes, they are huge! About 12 inches long.
The hoop skirt's steel wire is pretty tough stuff, though. I had to put it on the floor and lean down on it with my whole body weight to snap off a snip. But it did the job! A nice clean cut, that meant I didn't need to use the metal file. Then it was a matter of feeding the hoop wire into the 4 rungs of casings. I joined the ends with Gorilla duct tape.
Sorry my camera ran out of battery, so I couldn't take a photo tonight of the finished hoop skirt. But trust me... it's hanging on the door in free-form and it looks circular. So I'm very confident it will hold its shape. The only mistake is that I came up about 6 inches short on the highest ring. A problem of measuring from the get-go, I suppose. So I bridged the gap with that awful plastic stuff. It's not the greatest, but after all it's the top ring and the other 3 are doing great. Let's see how it looks when we try it on my friend "A" and whether it's going to look all right under the gown. Only 2 weeks until we go to the Dickens Fair!! Ahhhhh!!!
The hoop skirt's steel wire is pretty tough stuff, though. I had to put it on the floor and lean down on it with my whole body weight to snap off a snip. But it did the job! A nice clean cut, that meant I didn't need to use the metal file. Then it was a matter of feeding the hoop wire into the 4 rungs of casings. I joined the ends with Gorilla duct tape.
Sorry my camera ran out of battery, so I couldn't take a photo tonight of the finished hoop skirt. But trust me... it's hanging on the door in free-form and it looks circular. So I'm very confident it will hold its shape. The only mistake is that I came up about 6 inches short on the highest ring. A problem of measuring from the get-go, I suppose. So I bridged the gap with that awful plastic stuff. It's not the greatest, but after all it's the top ring and the other 3 are doing great. Let's see how it looks when we try it on my friend "A" and whether it's going to look all right under the gown. Only 2 weeks until we go to the Dickens Fair!! Ahhhhh!!!
Friday, November 29, 2013
Success Hoops!
It's the Friday after Thanksgiving, and the postal carrier brought me a heavy envelope. The steel hoop wire (ordered off the internet) has arrived! Yeah! I threaded it into the bottom casing -- that nice coutil twill tape from Lacis -- and it slid in like a dream. The choice of plastic coated steel wire was absolutely correct. Much much much easier than the plastic stuff or even what buckram-coated wire would be. Also, it appears to hold its shape quite well. I'm sure when all 4 rungs are inserted, it will make a fine cage crinoline.
One thing I didn't plan on, though. I DON'T OWN ANY HEAVY DUTY WIRE CUTTERS! Hmmm.... Always with the problems, I am.
Sunday, November 24, 2013
Jumping through Hoops
Here's yet another example of why the proper choice of materials is essential to a project turning out correctly. HOOP SKIRT IS A FAILURE. It was all going along so well. I had cut the basic skirt shape. I stitched up the seams. I put in a nice waistband borrowed from another pattern, and it's all so very lovely so far. Then I carefully measured and put in the twill tape in the rows and rows of rings that will be the casing for the hoop boning. So far, it's a happy Sunday afternoon.
Then, after taking a break to eat some grocery store California roll, I inserted the hoop boning that I'd just bought from Lacis in Berkeley. My mistake was in picking the lower priced stuff ($8 a roll) because their spring steel hoop boning was $50 a roll. Quite a price difference! BUT the plastic stuff does not hold its shape. It curls and warps every which-a-way.
No, this isn't me turning around. This is the shape it makes standing still. Inconceivable!! I hate to bad-mouth Lacis -- a landmark in Berkeley since forever -- but really, are those the only 2 choices? I am forced to go elsewhere in search of the perfect hoop skirt wire.
Then, after taking a break to eat some grocery store California roll, I inserted the hoop boning that I'd just bought from Lacis in Berkeley. My mistake was in picking the lower priced stuff ($8 a roll) because their spring steel hoop boning was $50 a roll. Quite a price difference! BUT the plastic stuff does not hold its shape. It curls and warps every which-a-way.
No, this isn't me turning around. This is the shape it makes standing still. Inconceivable!! I hate to bad-mouth Lacis -- a landmark in Berkeley since forever -- but really, are those the only 2 choices? I am forced to go elsewhere in search of the perfect hoop skirt wire.
Butterick 5831
I bought the Butterick pattern #5831 last year, when Joann Fabrics had their buy-a-bunch-of-patterns-real-cheap sale. It's marketed as a Civil War ear dress, but really the sloped shoulders make it acceptable for the Dickens Fair too. I've always wanted to try it, and this year I got the chance!
BTW, I prefer Butterick patterns because they have a clean, no fuss approach. The Simplicity patterns tend to have a lot of unnecessary steps and details which makes them a bit more work to adjust for size. I'm actually making this dress for my friend ("A") but except for my larger waistline we're almost sort of the same size.
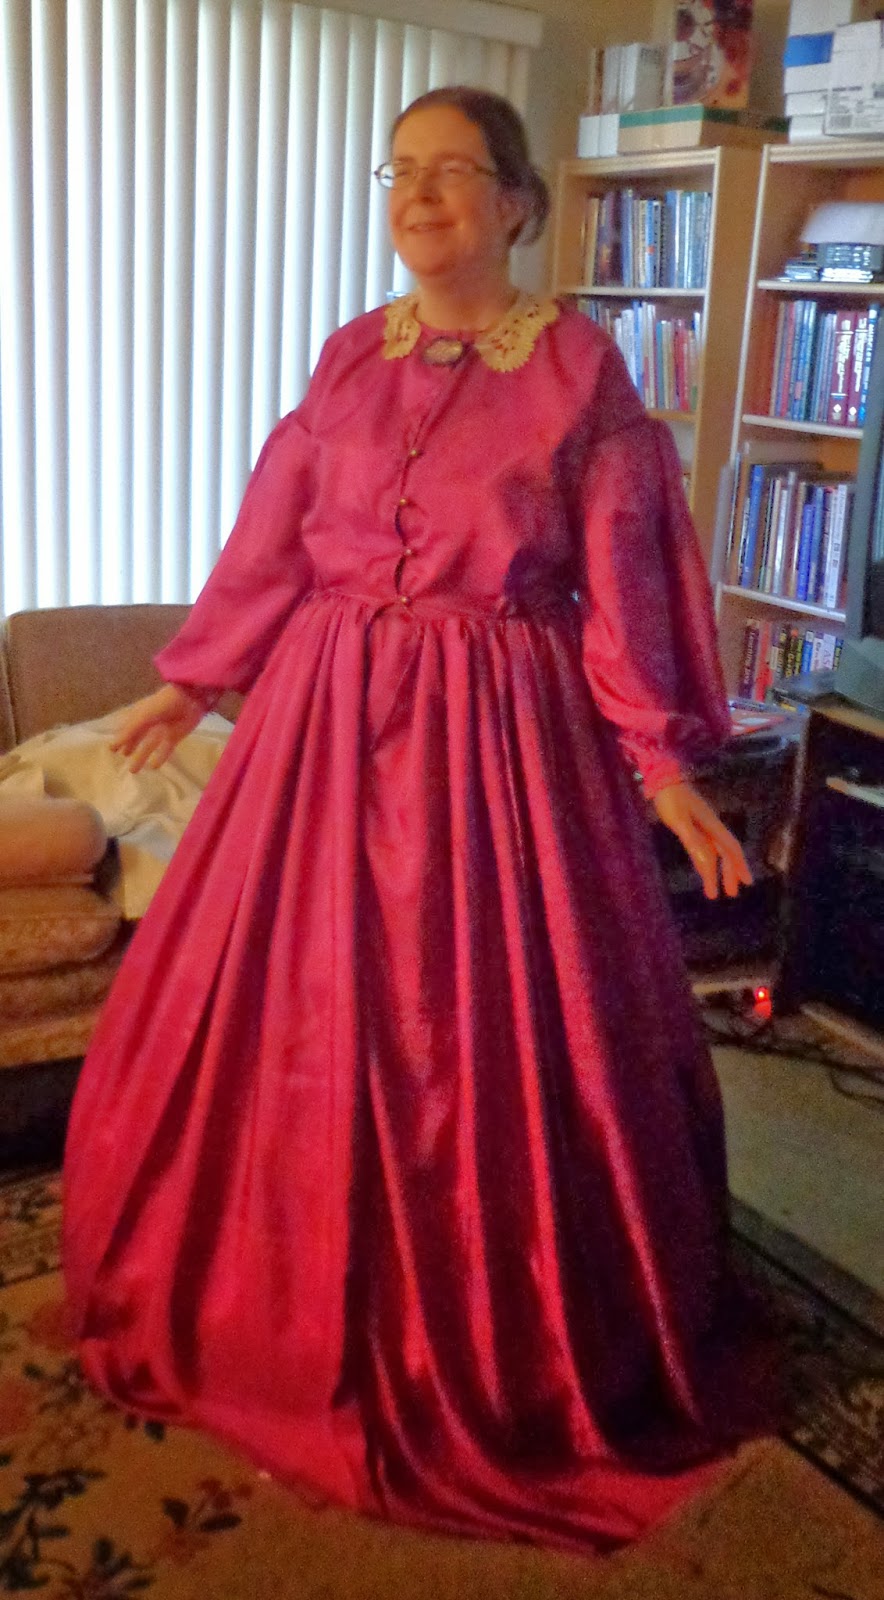
My first decision -- and this made all the difference in the world -- was the choice of fabric. This is a "silkessence" polyester silk imitation, but it handles beautifully. It doesn't fray too much. It doesn't pucker. It is soft but not as impossibly slippery as gossamer, and with it's lower price it's not as scary to cut into as silk. Plus, I didn't make too many modifications to the original pattern. I was a good girl and followed most of the directions, including a cotton lining under the bodice that's a sort of fake chemise, and I put piping at the shoulder seams. The fabric was so thin and silky that I didn't need to do tedious cartridge pleats to gather the waistband. Whew! Also, I chose to make self-fabric loops for the buttons instead of button holes. I put a little modesty panel inside the front gap of the skirt. I hand-basted a lace collar that I got in the grab-bag at a rummage sale, and that really jazzes it up.
All I need to do is hem the bottom, which I can't do until "A" tries it on again, and which I can't ask her to do until I finish her hoop skirt. (Right now, I'm trying it on over my own ratty ol' hoop skirt.) Glad her mom gave me that big bag of muslin to work with.
BTW, I prefer Butterick patterns because they have a clean, no fuss approach. The Simplicity patterns tend to have a lot of unnecessary steps and details which makes them a bit more work to adjust for size. I'm actually making this dress for my friend ("A") but except for my larger waistline we're almost sort of the same size.
My first decision -- and this made all the difference in the world -- was the choice of fabric. This is a "silkessence" polyester silk imitation, but it handles beautifully. It doesn't fray too much. It doesn't pucker. It is soft but not as impossibly slippery as gossamer, and with it's lower price it's not as scary to cut into as silk. Plus, I didn't make too many modifications to the original pattern. I was a good girl and followed most of the directions, including a cotton lining under the bodice that's a sort of fake chemise, and I put piping at the shoulder seams. The fabric was so thin and silky that I didn't need to do tedious cartridge pleats to gather the waistband. Whew! Also, I chose to make self-fabric loops for the buttons instead of button holes. I put a little modesty panel inside the front gap of the skirt. I hand-basted a lace collar that I got in the grab-bag at a rummage sale, and that really jazzes it up.
All I need to do is hem the bottom, which I can't do until "A" tries it on again, and which I can't ask her to do until I finish her hoop skirt. (Right now, I'm trying it on over my own ratty ol' hoop skirt.) Glad her mom gave me that big bag of muslin to work with.
Subscribe to:
Posts (Atom)