Showing posts with label costume. Show all posts

Sunday, September 9, 2018

Lady Mothra


My Award-Winning Costume of Worldcon 76


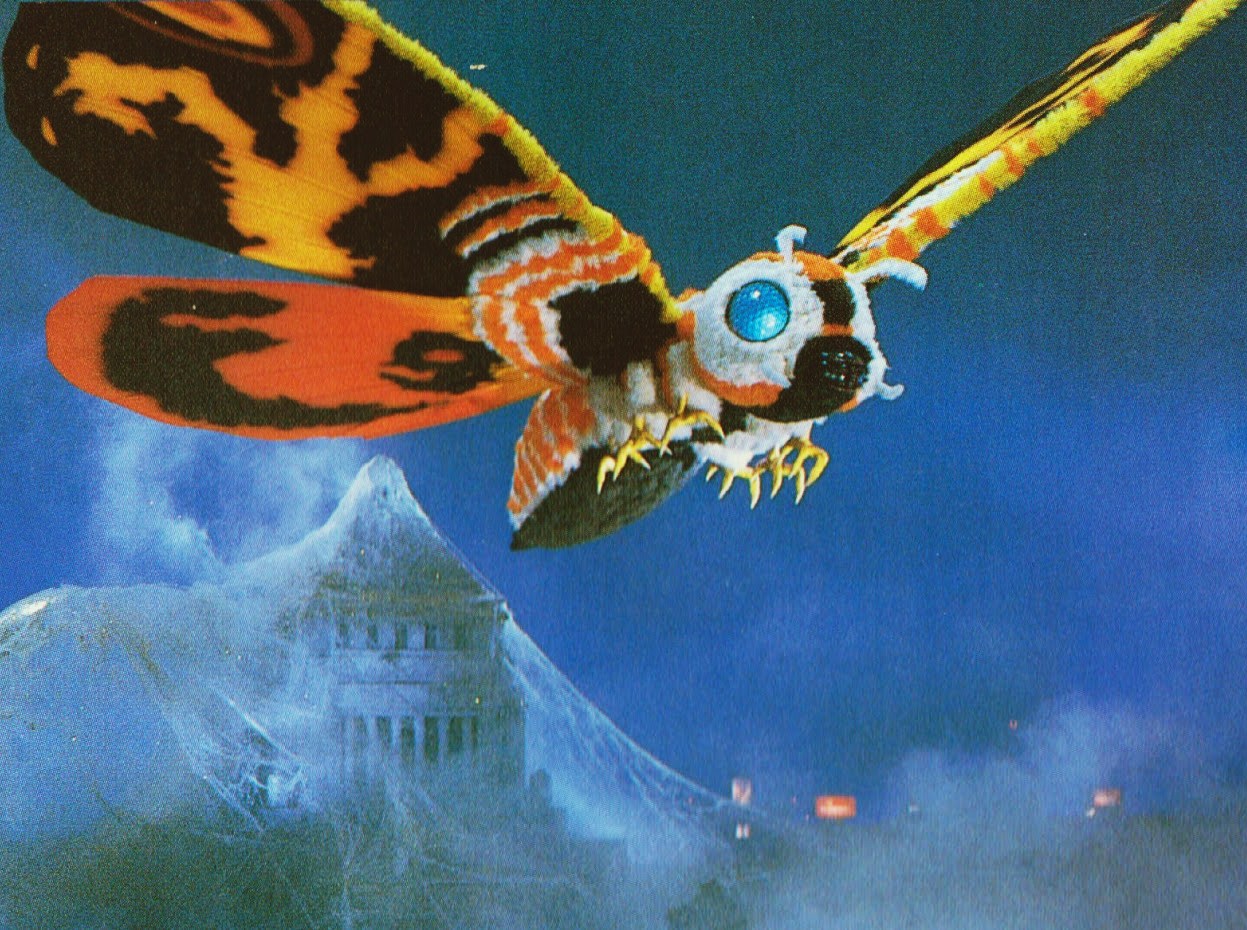
My inspiration came from MOTHRA--the 1961 Japanese film that I've loved since I was a child. Recent films like Pacific Rim and the Godzilla remake got me interested in giant monsters again.


My original concept for the costume was a geisha in the elaborate kimono and wings would emerge out of the obi (bow) in the back. My music choice would have been the final aria from Madame Butterfly. The more I thought about it and envisioned my stage performance, the less appealing that whole scene became.


I re-watched the original film and realized that Mothra is a gentle-hearted monster. A greedy businessman massacres the native people of Mothra's island in order to kidnap the little fairy girls and force them to perform on stage. The fairies sing a song to summon Mothra who journeys across the ocean to rescue them. All of the destruction caused by Mothra along the way could have been avoided if only the greedy businessman had honorably returned the fairies to their home. In the end, it is not military might but the compassion of newspaper journalists who give the fairies up to Mothra who takes them home.

My design changed into a combination of Mothra wings + Victorian bustle gown to capture the elegance of this graceful monster with the essence of a fuzzy moth body. I had wanted to make the wings first and the garment second, but with mishaps of acquiring materials, I ended up doing the opposite.

Here is how I made the four main parts, in order of construction: the headpiece, the jacket, the bustle skirt, and the wings.

Headpiece

For the pattern, I used a generic peasant cap. I made buttonholes on the top center panel to insert a giant pipe cleaner for antennae. The eyes are foam half-disks covered with blue glitter--so much glitter! Tip: I used an empty plastic container of grocery store salad mix to contain the sprinkling glitter. The eyelashes are yarn that I wrapped around two chopsticks, stitched a thin ribbon down the middle, cut at the edges, and folded. 


Jacket

For the pattern, I used a sporty jacket that I had used before as the tunic of General Leia Organa. I decided on sleeveless because I would need to raise my arms to lift the wings. I made the center panel in contrasting brown taffeta to line up with the center panel of the skirt--capturing the essence of Mothra's abdominal colors.

I made two slits in the back seam where I planned to insert the straps of the wings' harness. More on that below. The separating zipper was a life-saver, backstage, as I could unzip the jacket and cool off before the performance. 


Bustle Skirt

For the pattern, I used a commercial pattern that I had never used before. I've made two bustle skirts previously, but despite that experience I wrestled with it more than I had planned. Part of it was a lack of clarity in the printed instructions, so I took it step by step. Only after completing a step, I would think of a more efficient way to achieve the same result. The large amount of fabric (9 or 10 yards) was also difficult to handle. Often I found myself swallowed under the "tent" tucking up the tucks or spreading out panels of taffeta the full length of the living room floor.


The only modification that I made was in the trim. The pattern wanted me to hand-pleat the entire bottom ruffle in three rows. Sorry, but no. I purchased cotton eyelet.

Tip: for the bustle pillow, I used a jumbo sponge from the hardware store and filled out the edges with regular poly fiberfill.

Once it was finished, though, I am very happy with the end product. Putting it on is a breeze! Step in… Two skirt hooks… Done! Taffeta has a great stiffness that holds its shape and has a wonderful sheen under stage lights.

Wings

Given my insect phobia, I had to study photos and diagrams of real moths. I compared them to images of Mothra and sketched a design.


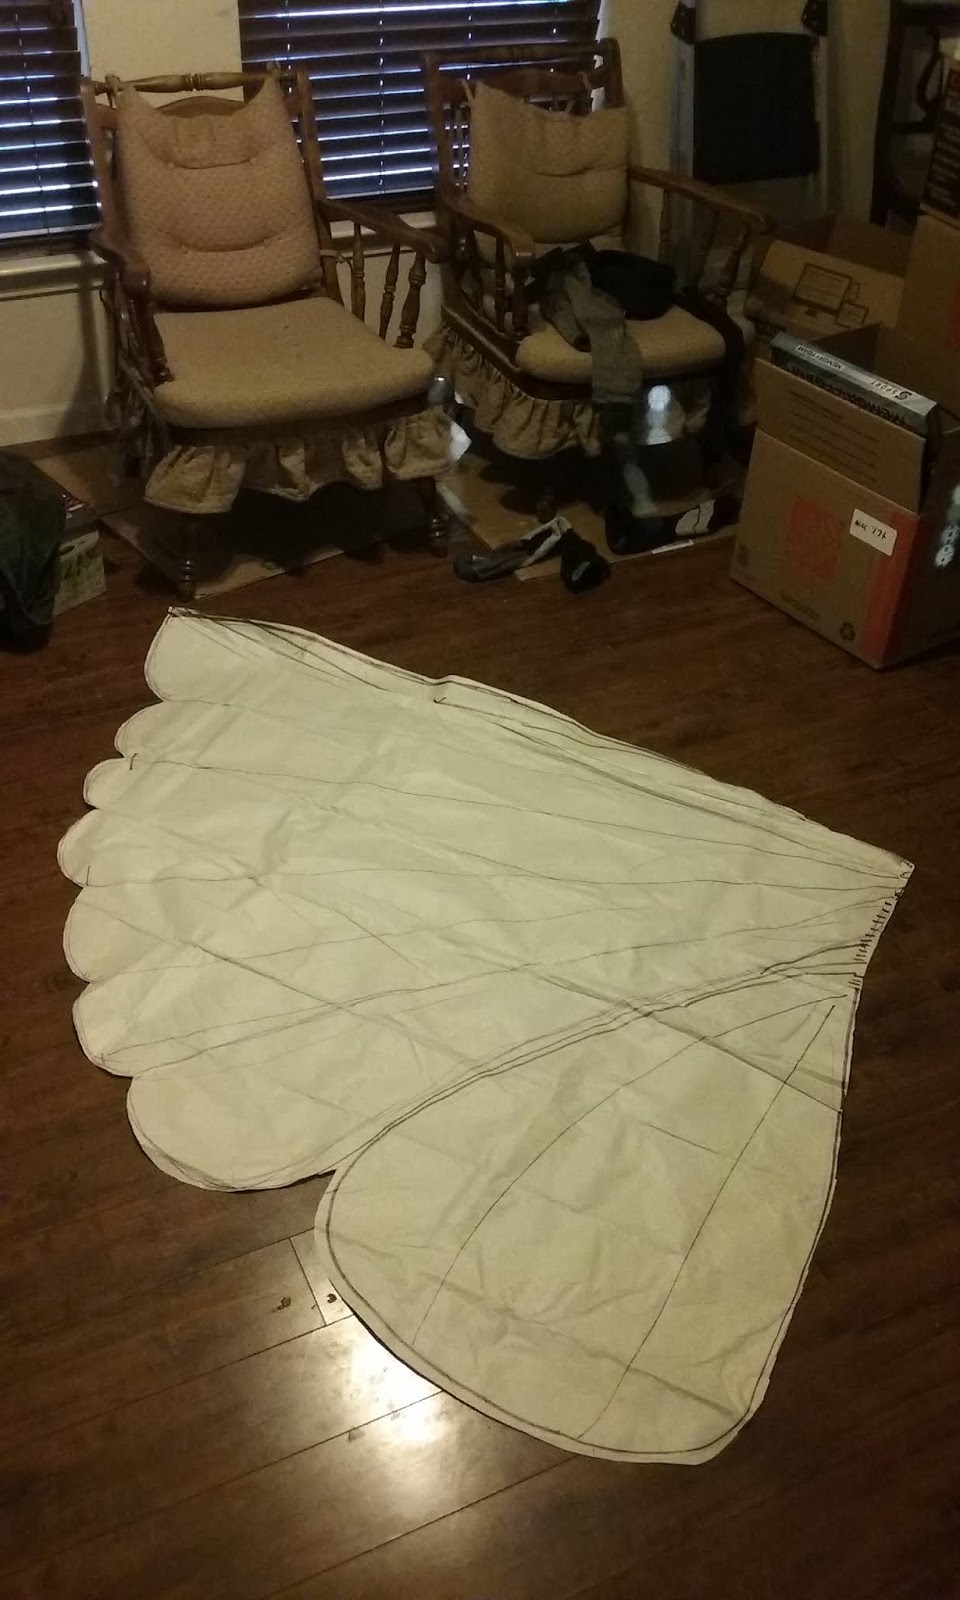
 For the pattern, I used paper drop cloth from the hardware store. My husband assisted by tracing the outline of my body as I spread-eagled on the living room floor. From that outline, I free-handed the upper and lower wings.


I considered several fabric options until I stumbled upon something called Smart-Fab. I ordered a small packet of multi-color sheets to experiment with the texture, the thickness, and how it behaved for paint and glue. Pros:  it doesn't fray, it doesn't rip, it is slightly opaque, and it is easy to paint. Cons: the instructions claim it takes all kinds of glue except hot glue, when in reality hot glue was the only thing that really stuck.

My idea was to dip macramé cord in white glue and lay the cords on the wings. Not only would it give structure but it would mimic the veins of real moth wings. I bought an entire gallon of Elmer's glue at the hardware store and used the grocery store salad container as a dipping bowl.

To my dismay, the glue-dipped cords did not stick! I tried samples with tacky glue, gorilla glue, stinky epoxy glue, but the only thing that really worked was hot glue. I went through two whole packages of glue sticks.  Tip: use a wooden chopstick to press a narrow thing down and save your fingertips from burning.


Thanks to the opaque texture of Smart-Fab, I could use my paper dropcloth pattern to trace the Mothra design onto the wings. Then came the PAINT.


I used the expensive stuff because my tests of cheap fingerpaint or poster paint did not have the brilliance or smooth coverage. I used all of the orange, yellow, and most of the red. I ran out of black and had to run to Michael's for more. What took the most time was waiting for it to dry.  Remember, I had to paint each side, left and right in mirror images. My dinner table could only take one wing at a time. I lost track of time, but I think it took a full two weeks just to paint them.


Coming this far, why not go all the way in my attention to detail? Mothra has a soft fuzz on the upper edge of the wings, and a panel of white and orange stripes. I painted orange stripes on white felt, although in hindsight I could have bought orange felt too. I cut long strips of fleece and hot-glued it over the top edge. Also, in addition to the macramé cords, I sewed casings of Smart-Fab and inserted wooden dowels. If I had to do it again, I would use 12-gauge craft wire because the wooden dowels cracked afterwards when going back into the closet.


The "thorax" is an oval of orange taffeta to match the back of the jacket. Inside are strips of twill tape where I used buttonhole thread to stitch on the wings.


The shoulder harness is the part that I left until the last-minute. I did not expect the wings to get so HEAVY after all that glue, cord, paint, dowel, felt, and fleece. Stupid me, I used paracord to loop over my shoulders. I looped twill tape around my legs, like a safety harness, and used a carabineer to clip the paracord onto it. Sure, getting into the costume was easy enough. By the end of the evening, the cords had dug rope burns into my shoulders.


Overall, I'm really pleased with how it turned out. The wings are easy to wear and looked spectacular when I lifted them up on stage. I feel honored to have earned an award at a world-class competition. For the next time, I am making a new harness!


Tuesday, January 21, 2014

White and Gold Corset

I have been promising and promising my daughter that I'd make her a white and gold corset. I got this fabulous white brocade from a friend taking down her curtains. I've lined the inside with the beige coutil I had leftover from another project.

The mail order busk arrived yesterday, and I put it in the seams last night. It looks really lovely so far.


Now it's ready to try on, and make any last fitting adjustments before I do the boning channels. This is my first attempt at a "nice" corset using the Silverado style in the Laughing Moon pattern -- yeah, the one with the intimidating gore inserts. I've tried it before with plain denim for my friend to wear under her Dickens Fair gown, but never something nice enough to be seen. The pressure is on!!

Sunday, December 1, 2013

Hoop Snips

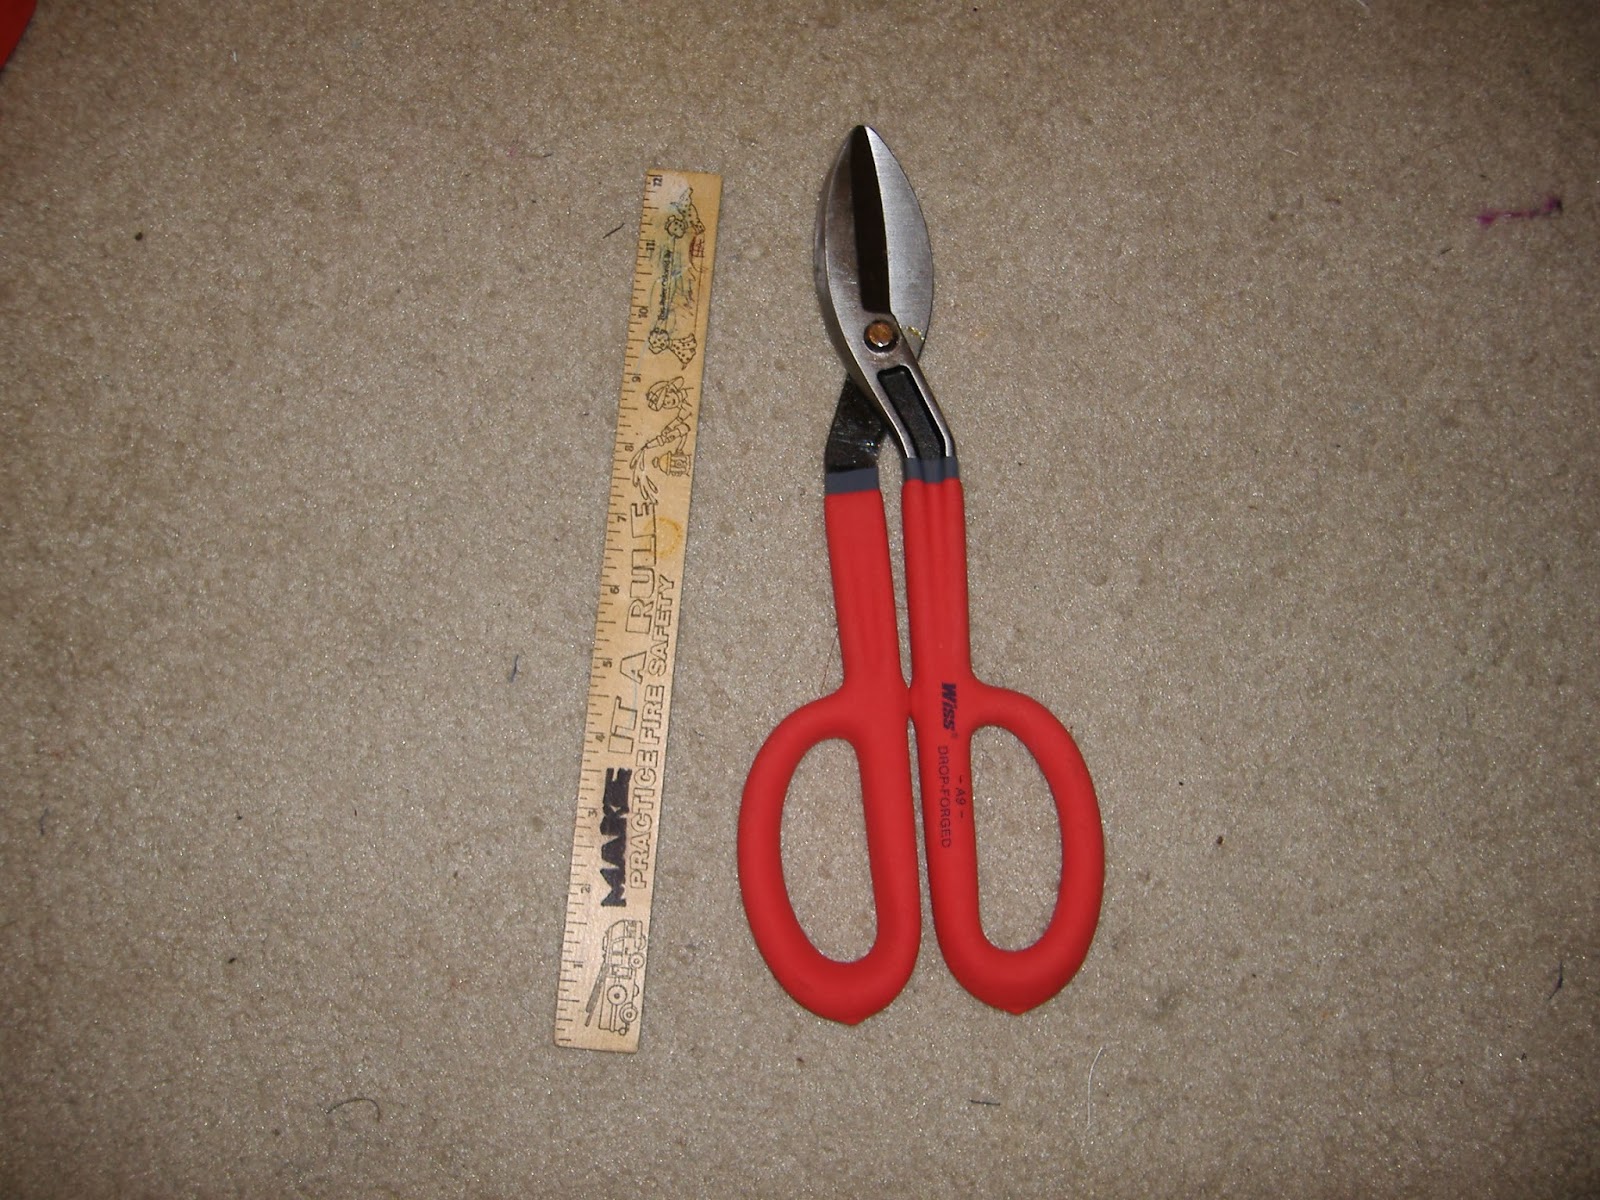
I let the Black Friday crowds die down, and on Sunday afternoon I went to OSH for "tin snips." Not sure of which kind would be best, I got the biggest ones they had for under $15. I figure they'll be handy to have around the house. Yes, they are huge! About 12 inches long.


The hoop skirt's steel wire is pretty tough stuff, though. I had to put it on the floor and lean down on it with my whole body weight to snap off a snip. But it did the job! A nice clean cut, that meant I didn't need to use the metal file. Then it was a matter of feeding the hoop wire into the 4 rungs of casings.  I joined the ends with Gorilla duct tape.

Sorry my camera ran out of battery, so I couldn't take a photo tonight of the finished hoop skirt. But trust me... it's hanging on the door in free-form and it looks circular. So I'm very confident it will hold its shape. The only mistake is that I came up about 6 inches short on the highest ring. A problem of measuring from the get-go, I suppose. So I bridged the gap with that awful plastic stuff.  It's not the greatest, but after all it's the top ring and the other 3 are doing great. Let's see how it looks when we try it on my friend "A" and whether it's going to look all right under the gown. Only 2 weeks until we go to the Dickens Fair!! Ahhhhh!!!

Friday, November 29, 2013

Success Hoops!

It's the Friday after Thanksgiving, and the postal carrier brought me a heavy envelope. The steel hoop wire (ordered off the internet) has arrived! Yeah! I threaded it into the bottom casing -- that nice coutil twill tape from Lacis -- and it slid in like a dream. The choice of plastic coated steel wire was absolutely correct. Much much much easier than the plastic stuff or even what buckram-coated wire would be. Also, it appears to hold its shape quite well. I'm sure when all 4 rungs are inserted, it will make a fine cage crinoline.


One thing I didn't plan on, though.  I DON'T OWN ANY HEAVY DUTY WIRE CUTTERS! Hmmm.... Always with the problems, I am.

Monday, September 30, 2013

Done with Ears

I tried to stick the ear pieces onto a plastic headband, because that was the original plan, but no matter what I did -- they never looked quite right.

In the end, I glued the 2 ear pieces separately onto a thick band of twill tape with a wire in it. Then I stitched the twill tape directly onto the fur hood. The wire + the support of someone's head inside the hood appears to keep the ears upright just fine. To cover the twill tape and globs of hot glue, I stitched extra scraps of fur around it, and it all blends in to look quite shaggy and wild.


The ears are maybe a little too close together, but that's the trade-off to have them upright.

Sunday, September 29, 2013

Hello Kitty corset

I must say, as a side project the "Hello Kitty" corset turned out well. Originally it was cut from scrap fabric as a mock-up for sizing the fancy turquoise brocade corset that I've been working on the last month. I'll post photos of that next week after I try it on my friend.

But the mock-up was too cute to just toss away, and my daughter encouraged me to finish it up. I put in 24 steel bones, tiny pink bows, made a bias strip of the Hello Kitty fabric to finish the top edge, laced it up properly in the back with a modesty panel, and luckily had a scrap of pink lace trim that fit just right!


Look for it on sale at Etsy soon!

Sunday, September 15, 2013

Boning Channels... Done!

Euphoria! It was one of those rare Sundays when - aside from scrubbing the kitchen counter and sink - I had no urgent "life" business to deal with. So I hunkered down in the sewing room and made huge progress today.

First, after hand basting down all the seams like the instructions said, I went down the same lines with the machine. What I really like about my Kenmore Ultra Stitch is that part of the base slides off to make a narrow extension around the pressure foot. The design is for doing sleeve cuffs, etc. This allows me to get my right hand underneath and make a sandwich with my left hand. (For taking the picture, I had to use my left hand.) I can really feel and control how the material feeds into the needle.


Actually, in this picture I am stitching the line across the bottom, but you get the idea.

I stitch the boning channel on the seam lines from the outside, because the seams of the lining don't exactly sync up with the fashion fabric. I had to do a little scooching here and there. Not much. But like I said, 1/8 or 1/4 inch can really make a difference.

It doesn't matter so much if the seam lines don't line up on the inside. Nobody sees the inside.


The instructions tell me to make all the vertical lines for boning channels by neatly stitching in meticulously measured rows. OK, now, this is supposed to be a fun project. Measuring and marking precise lines does not come naturally to me! Instead, I used "hem tape" which has markings on it already at 1/4 inch widths.


I went into a kind of Zen meditation mode to put them on -- one by one by one by one -- stitching slowly and neatly down each line. By the afternoon, I had all the boning channels installed at last!


The last step will be to insert the actual steel "bones" but since I don't have a corset workshop full of buckets of all sizes, I'll need to buy what I need. That involves measuring each bone channel and making a list. 


My sort of goofy way to aspire toward accuracy uses 1/4 inch plastic cable ties from Home Depot. This also checks that the hem tapes are sewn in correctly. You can't see in the picture, but I used a small Sharpie pen to write on the plastic tips:  1, 2, 3, 4, etc. Then I'll make a list on paper and write down exactly what I need. When the order comes in the mail, I won't have to fiddle with a jumble of 2 dozen little sticks to figure out what goes where all over again. 

So, tomorrow is Monday which means back to the office job. Once I acquire the bones, I'll be able to finish it up pretty shortly thereafter. I can't wait to try it on my friend "C" - she's going to look fabulous!

Thursday, September 12, 2013

One Grommet At A Time

For fixing the mistake from yesterday, I cut a new center front piece of fancy brocade and prepp'ed it by attaching to the saved piece of coutil. Blank slate, just like before. I marked again where holes should be poked but stopped before going at it. One shouldn't do precision work when one is tired! I'll bring it to the office and do it tomorrow on my lunch hour.

Instead, I worked on my Regency gown a little.... yes, I have a project on the side for myself! It's the old standard Simplicity 4055 that I've always wanted to try. I stopped at where I'll need to make a placket for the back opening of the skirt. I've never made a placket before! And let's not even think about the button holes right now.

Then I decided to whack at things with a hammer. After all these years of Ren Faire bodices, pounding in grommets is something I know how to do. I made a tool for myself of hole punches in pattern graph paper and used it to mark in chalk where grommet holes should go. Boy that coutil is a dense tight weave! I had quite a time coaxing those threads open before I managed to put in just one. One is enough for now.


The "antique brass" color grommets match up with the "antique brass" color busk hooks. They're going to look really nice on the turquoise-and-brown brocade. 

Fixing Mistakes

At the workshop I attended in February this year, Carol Wood (who is brilliant!!) advised us all, "Every stitch you put in, you may someday rip out."  Boy was she right. I keep 2 seam picker tools nearby in a cute little plastic case from Daiso that was designed to hold a kid's chopsticks in the lunch box.


Only the cheap polyester/nylon satin brocade is ruined. I can save the coutil, yeah! I'll just cut another piece and try again.

Yes, I went to YouTube and watched the Bishonen Rancher channel about how to insert a busk. If I wasn't so cheap and stubborn, I would pony up the $19 for a DVD that accompanies the Laughing Moon pattern that I am making right now. It's the pattern's designer going through it step by step by step. Probably more stubborn than cheap. Anyway, the YouTube video explains it pretty well.

https://www.youtube.com/watch?v=DcqOgBncg0k

Sunday, September 8, 2013

Princess Mononoke's knife

You would think that with Halloween Superstores opening everywhere, there would be a ready source of caveman knives, Native American knives, etc. Yes I know about the internet! But I like to get the feel of it before I buy it, and you can't do that online.


After a long fruitless search, I decided to make the knife. Several failed attempts at molds and materials later, I made an “Insta-mold” in a plastic drink bottle. I formed the base object out of regular kindergarten modeling clay which worked just fine in the molding medium. Then I cast it with “Permastone” and just now turned it out. I think... maybe it's too soon to tell, but I think it's going to work!